Welcome! This page will show you how to assemble your 1:200 Delta IV Heavy. Follow these instructions carefully, and you will have an accurate 1:200 scale model of the Delta IV
Heavy, the most powerful rocket available today!
Tools needed:
Glue
Scissors
Some good music
A lot of free time.
Step 1: You must have built three CBCs before you can build your Delta IV Heavy. If you haven't, please go here.
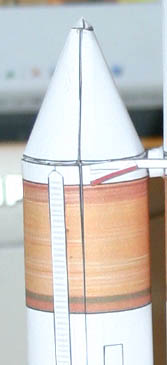
If you have, then cut out parts 5 and 8, and form into cones. Use the accompanying glue tabs to glue the cones. Then, cut out parts 7 (NOT INTERCHANGEABLE WITH 16!), and glue
to the tops of the cones. Glue the cones to the TOPS of the two CBCs that you will be using as strap-ons. Align the seams on the cones with those on the CBCs.
They should look like this:
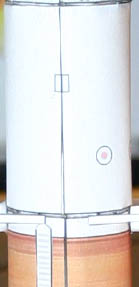
Step 2: Cut out part 4 and glue with the accompanying glue tab, forming a cylinder. Fold the triangular tabs 90 degrees inward, and glue the part to the central CBC (without the
cones), as oriented below, such that the seams are aligned and the small square is closer to the top. Cut out part 6 and glue to the top of part 4.
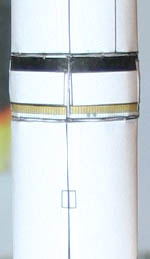
Step 3: Cut out part 3 and form into a cylinder with the accompanying glue tab. Fold the triangular tabs 90 degrees inward, and glue to part 4/6, aligning the tabs, with the
black band at the top. Cut out part 15 and glue to the top of part 3. Cut out part 9 and glue around part
3 between the black and yellow bands. Start at the seam of part 3 and glue around the part 3.
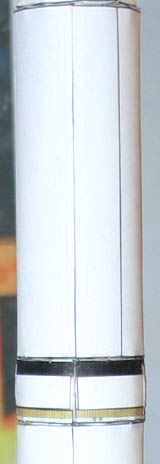
Step 4: Cut out part 1 and form into a cylinder with the accompanying glue tab. Fold the triangular tabs inward 90 degrees, and glue to part 3, so that the seams are aligned
and the end that was at the top when the sheet was printed is at the top. Glue part 15 to the top of part 1.
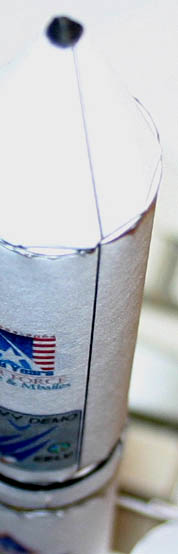
Step 5: Cut out part 2 and form into a cone with the accompanying glue tab. Cut out part 16 and glue to the small end of part 2. Finally, glue the cone onto the top of part
1.
*WARNING!* DO NOT ALIGN SEAMS ON PARTS 2 AND 1! ALIGN THE PRINTED LINE ON PART 2 WITH THAT OF PART 1, AS SHOWN BELOW!
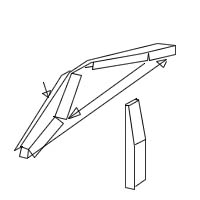
Step 6: Cut out part 11 and form as shown below. Do this 8 times.
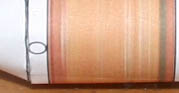
Step 7: Cut out parts 13, fold over the tabs 180 degrees, so that the tabs are FLAT against the bottom of the part. Roll the parts into ovals approximately the size of the
ovals on the side of the CBCs, as shown below. Glue, and then glue the pars onto the ovals on the sides of the CENTRAL CBC (the tallest one).
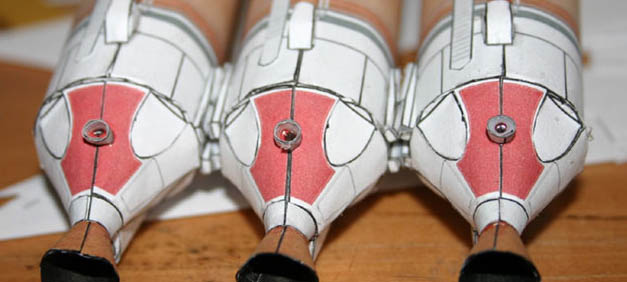
Step 8: Glue the eight part 11s to the CBCs, four on the core CBC and two on the strap-ons. Glue the part 11s on the two lines on the bottom sides of each CBC, as shown below. Ensure
that the narrow end of part 11 is pointing to the top of the CBC.
Make sure you glue the two part 11s on the strap-on CBCs on the correct sides! Refer to the picture below. (seams UP)
Step 9: Apply glue to the part 11s on the central CBC, and apply glue to the edges of part 13. Glue the CBCs together at these two points, making sure that the part 11s on
the strap-on and core CBCs are aligned and the ovals on the strap-ons are glued to the part 13s. Make sure that you do not glue the CBCs on backwards- the LOX feedlines
should all be facing the same way!
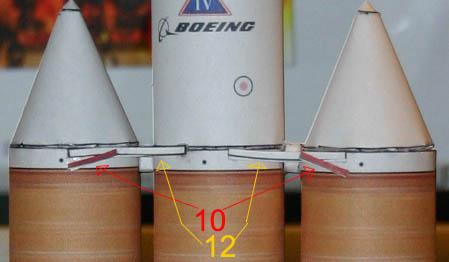
Step 10: Cut out parts 10 and 12, fold along the middle lines, and glue to the rocket as shown. Repeat for the other side.
Step 11: Cut out parts 14, glue to the black lines on either side of part 3, as shown below.

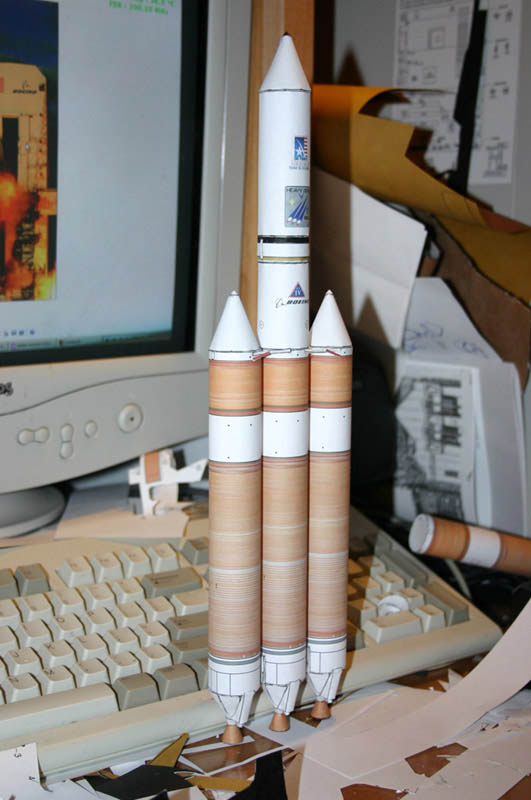
Congratulations! You have finished your Delta IV Heavy rocket, the most powerful rocket today!
Go back